Location simulation
With Location simulation you can use objects and paths located on the map as simulation targets to which other objects are moved when a simulation is run. The simulator can move pre-existing objects from your dataset or can use a Simulation Lifecycle to create and move one or more simulated objects of the same type. Unlike pre-existing objects, simulated objects exist only for duration of the simulation, are created when the lifecycle is activated and are automatically removed on deactivation.
During a simulation, how moving objects behave, for example their speed and how the simulator injects their locations, is determined by the parameters of their Simulation Behaviour.
There are three simulation modes that determine how the simulator injects locations:
- drive objects directly
-
In drive objects directly mode, the simulator injects locations for an object that has a target.
- drive tags only
-
In drive tags only mode, the simulator injects locations for the tag attached to the object, and another (non-simulation) Ubisense service moves the object.
- drive tags and counterpart
-
In drive tags and counterpart mode, the simulator injects locations for the tag attached to the object and also creates an extra counterpart object that is used to give a visual indication (a transparent rep on the map) of what the simulator is doing under the hood. This is because tag locations have noise added and location rules might make the object be nowhere near the simulated position. Generally, the counterpart will be very near the simulated object, but they are not the same thing. The counterpart object doesn’t exist in the other simulation modes.
With the use of Business rules, complex rules and behaviors can be built to model real-world processes within the SmartSpace 3D virtual environment.
This guide describes the requirements and installation for Location simulation; the parts of the user data model relating to Location simulation; and takes you through from the simplest steps in creating simulations to building examples with the use of Business rules.
Installing Location simulation
Location simulation was introduced in SmartSpace 3.6.
Requirements
Location simulation requires the following features to be licensed and installed:
- Location simulation
- Paths and queues
- Rules engine developer
If you want to use the example rules, you must also load and publish the simulation example module (simulation_example_generic_module.xml).
Installation
Install the Location simulation feature
To install Location simulation:
Make sure that the SmartSpace platform includes a license for the Location simulation feature and install it using Service Manager.
For further information on all aspects of installation, see SmartSpace Installation.
Load the simulation example module
To make use of the simulation example module:
Download ubisense_simulation_example.ssc from the Ubisense Downloads Portal.
In SmartSpace Config:
- Open BUSINESS RULES and click Load.
- At Load file, browse to ubisense_simulation_example.ssc and load the required items.
- Publish the loaded rules so that they are now active in your dataset.
For further information on loading and publishing modules, see
User data model
The following types, properties and assertions relate to Location simulation. Examples of their configuration and use are introduced in First Steps with Location simulation and an example using business rules is given in Simulation example with Business rules.
Location simulation types
This is a parent type to group the simulation control types in SmartSpace Config. Do not create instances of this directly.
A named simulation behavior has a set of service parameters that define how objects behave in simulation. Behaviors are applied to objects using a simple property.
A named simulation lifecycle has a set of service parameters that define a set of objects to be created while the lifecycle is active. The objects can be given tags automatically, and they are cleaned up when the lifecycle becomes inactive.
A simulation target group is used to make random routing decisions. You make assertions about which objects are members of the group, such that a group contains a set of potential simulation targets. When an object targets the group itself, the simulator chooses one of the group members at random and changes the simulation target property accordingly.
A counterpart is an object given a name and representation by the simulator, and located at the ideal position calculated by the simulator. It is a visual guide to the internal simulator state, so will normally have a higher rate than simulated tag locations. The counterpart type itself is not user-visible.
Properties
All objects get these following simulation properties, which tell the simulator where to move the object. These properties can be set by business rules. Only the target is required to make an object move; the behavior has default values defined by service parameters.
simulation behaviour <Object> : <Simulation Behaviour>
When the object is moving to a target, the behavior defines how it moves, via its service parameters. If the behavior property is not set, the object uses the default service parameter values.
- Path point targets
- If the target is a path point, the object takes the shortest route to the path, then moves along the path towards the target. If the object is not initially located, or is in a different location cell, it jumps immediately to the beginning of the path, before moving along the path to the target.
- Non-path point targets
- If the target is not a path point, the object moves in a straight line to its location. If the object is not initially located, or is in a different location cell, it jumps immediately to the target.
- Target spaces
- To roam around an area, you can configure the behavior to target the extent of one of the target’s spaces, instead of its location. For path points, the object follows the path to the path point first, then goes to the extent of the space. Once inside the extent of the space, the object moves straight to a new random point in the space. When it reaches the random point, it chooses a new one and repeats the process.
Assertions
<Object> reached waypoint <Object> : Bool
This is useful for making business rules that set simulation targets. The simulator makes this assertion as soon as an object reaches its target. Once inside a target space, the simulator makes the assertion when the object reaches the next random point. The assertion is removed after 2 seconds. If the target remains set, the assertion is made repeatedly, no more than once per second.
<Object> has counterpart <Counterpart> : Bool
This assertion, and the ‘Counterpart’ type, are implementation details not visible to the user. However, the counterpart objects themselves are visible, because they are given a name, representation, and location on the map. The simulator makes the assertion while simulating in ‘drive tags and counterpart’ mode, and ensures the counterpart is visible on the map with a name similar to “simulation counterpart of X” and a transparent version of the original representation. Counterparts are automatically removed when they are no longer being simulated.
<Lifecycle> manages <Object> number <Int> : Bool
This is a non-user-visible implementation detail. The simulator makes this assertion as it creates the objects for an active lifecycle, and retracts it as it deletes the objects for an inactive lifecycle.
You make this assertion to create objects as defined by the service parameters for the lifecycle. When you retract the assertion, the objects will be deleted by the simulator, using the delete pending flag. You cannot delete the managed objects if the lifecycle is active, as the simulator will bring them back.
<Simulation Target Group> has member <Object> : Bool
You make this assertion to configure which objects are members of the target groups.
Location simulation parameters
You edit parameters in SmartSpace Config in the SERVICE PARAMETERS task. Choose Location simulation from <select a configuration> to display the location quality monitor parameters described below.
Location Cell Parameters
In SERVICE PARAMETERS, choose Location simulation and drag Location Cell into the workspace to work with location cell parameters for simulations. Parameters can be set globally or for a selected location cell by dragging either 'Location Cell' objects or the required location cell from the dialog:

The simulator injects events into the location cell with a maximum number of events per transaction, defined by the batch size. You don’t need to change this unless locations are being dropped unexpectedly.
For larger simulations, you might need to increase the 'batch size' service parameter.
The time between simulation executions for each location cell is defined by the minimum period. You don’t need to change this unless the simulator is unable to keep up, in which case you can increase the value to stop the simulator using too much CPU, in order to investigate the problem.
Simulation Behavior Parameters
In SERVICE PARAMETERS, choose Location simulation and drag Simulation Behaviour into the workspace to define simulation behaviors. Parameters can be set globally or for a selected behavior by dragging either 'Simulation Behaviour' objects or the required behavior from the dialog:

acceleration period : Time Span
This is the period of time taken for objects to change speed. Normally, you don’t need to change it, but you can increase the value as a simple tool to smooth simulated movements.
This applies when targeting a group, where the simulator chooses a random member of the group. When false, all members of the group are candidates. When true, any members that are already targeted by another object will not be considered. If this means there are no available candidates, the simulation target remains unchanged until one of the members of the group becomes available.
counterpart rate (Hz) : Double
This is the rate at which locations will be injected for counterpart objects. It is useful to have this higher than the object rate so you get a better understanding of the internal state of the simulator at all times.
This is the rate at which locations will be injected for the object (or its tag). If the rate is zero, the simulator won’t move the object. If the simulator can’t keep up because there are not enough CPU resources, the actual rate might be lower, but object speed in m/s will still be respected.
One of ‘drive objects directly’, ‘drive tags only’ or ‘drive tags and counterpart’.
There are three simulation modes that determine how the simulator injects locations
- drive objects directly
-
In drive objects directly mode, the simulator injects locations for an object that has a target.
- drive tags only
-
In drive tags only mode, the simulator injects locations for the tag attached to the object, and another (non-simulation) Ubisense service moves the object.
- drive tags and counterpart
-
In drive tags and counterpart mode, the simulator injects locations for the tag attached to the object and also creates an extra counterpart object that is used to give a visual indication (a transparent rep on the map) of what the simulator is doing under the hood. This is because tag locations have noise added and location rules might make the object be nowhere near the simulated position. Generally, the counterpart will be very near the simulated object, but they are not the same thing. The counterpart object doesn’t exist in the other simulation modes.
For larger simulations, you might need to turn off counterparts and use one of the other modes.
When both object and target are located in the same cell, the object moves at this speed until it reaches the target. If the speed is zero, locations will still be injected, keeping the object stationary.
tag error - horizontal (m) : Double
This is the standard deviation of the horizontal tag error, applied when the simulator is driving the object’s tag (as opposed to driving the object directly).
For example, to make 95% of tag events fall within 1 m (measured horizontally) of the ideal location, set the value to 0.5 m .
tag error - vertical (m) : Double
This is the standard deviation of the vertical tag error, applied when the simulator is driving the object’s tag (as opposed to driving the object directly).
For example, to make 95% of tag events fall within 1 m (measured vertically) of the ideal location, set the value to 0.5 m .
When this matches the name of a space owned by the current target, the object will move to that space. When an object reaches a space, it will bounce around randomly within the extent. The string needs to match exactly the name of the property as it appears in SmartSpace Config. For a type T with spatial property ‘extent’, you can use “extent”, “extent of ‘T’” or “the extent of ‘T’”. When there is no match, the object moves to the target location as usual.
target space z offset : Double
When targeting a space, the object moves at this offset from the bottom of the space. Set the value to be greater than 0 to go higher within the extent.
timeout lower limit : Time Span
If the timeout is non-zero, this behavior will be removed automatically from objects. This is the lower limit on the timeout, so if it is less than the upper limit, the behavior will be removed after a random delay in between the limits. Since the simulation behavior is an object property, this timeout can invoke business rules.
timeout upper limit : Time Span
If the timeout is non-zero, this behavior will be removed automatically from objects. This is the upper limit on the timeout, so if it is greater than the lower limit, the behavior will be removed after a random delay in between the limits. Since the simulation behavior is an object property, this timeout can invoke business rules.
The default behavior is for objects to move facing forwards. This is always the case when moving to a path or target space. When moving to the target location itself, directly or along a path, you can use this parameter to control the object rotation. When true, the object will rotate steadily such that it matches the orientation of the target object when it reaches the target.
Simulation Lifecycle Parameters
In SERVICE PARAMETERS, choose Location simulation and drag Simulation Lifecycle into the workspace to define simulation lifecycles. Parameters can be set globally or for a selected lifecycle by dragging either 'Simulation Lifecycle' objects or the required lifecycle from the dialog:

initial behaviour : Simulation Behaviour
When the lifecycle first creates an object, it assigns this behavior to it. Since the simulation behavior is an object property, business rules can infer that objects have been created using this behavior.
The name prefix to use for the created objects. Names are maintained by the simulator while the lifecycle is active, so you can change this and the names will be updated.
The name suffix to use for the created objects. Names are maintained by the simulator while the lifecycle is active, so you can change this and the names will be updated.
The number of objects to create while the lifecycle is active. The set of objects is maintained by the simulator while the lifecycle is active, so you can change this and objects will be created or deleted as required.
The type of object created by the behavior. If you change this while the lifecycle is active, all the objects will be deleted and replaced with new objects of the new type.
The named tag position to use when fixing tags to new objects. The tag position must apply to the type of object being created.
If the initial behavior has simulation mode “drive object directly”, this is ignored. Otherwise, when the lifecycle first creates an object, it uses an available tag with this 4-byte prefix. For example, set the value to “99:99:99:99” to use tags starting with 99:99:99:99:00:00:00:01. Tags are not maintained by the simulator beyond the initial assignment because you might want to use automatic tag association and disassociation. Tag locations for unattached tags that match the prefix of any lifecycle are cleaned up by the simulator.
First Steps with Location simulation
This section takes you through the basics of configuring different elements of Location simulation in SmartSpace Config. We use an example of moving cars around the map. Each of the steps is simple, but in combination and used with Business rules, complex simulations can be constructed. See Simulation example with Business rules for example business rules and their implementation.
If you choose to work through these examples yourself, note that they all use the drive objects directly simulation mode.
Note: You may find the examples easier to work through in SmartSpace Config if you use the Floating windows option to enable the display of multiple tabs, for example both TYPES / OBJECTS to view and configure objects and OBJECT PLACEMENT to display their locations.
Moving a simulated object to another object
We start with a single object—a car—located on the map. By setting the simulation target property, a simulation of the car moves to a another object.
-
We create the types we will use to represent the car and its destination. In SmartSpace Config, choose TYPES / OBJECTS and double-click <Create new type>. In the dialog enter the type name “Vehicle” and choose Object from the list of parents. Enter “name” as the unique identification property. Click Save.
-
Repeat to create a type called “Destination”.
-
Import and assign representation models for these two types. See Model import and Model assignment for how to set a representation on a type in SmartSpace Config.
-
Create an instance of the Vehicle type, named “Car 1”. Then create some destinations, “Target 1” and “Target 2”:

-
We set the target for the car. In TYPES / OBJECTS, we drag the Vehicle type from the TYPE list into the workspace and double-click Car 1. Click Edit and at simulation target select Target 1. Click Save.

We should now see a simulation of the car on the map in OBJECT PLACEMENT located at Target 1:

-
In TYPES / OBJECTS, we drag out <Object> reached waypoint <Object> from the COMPLEX PROPERTY list to see that the simulator has asserted that Car 1 has reached Target 1:

See <Object> reached waypoint <Object> : Bool for a fuller description of this assertion.
-
We can move the simulation of Car 1 by editing its target. For example, by changing the simulation target to Target 2, we see the simulation move across the map from Target 1 to Target 2:

-
Before we can manually move an object that has undergone simulation, or remove it from the map, we must unset the simulation target. In TYPES / OBJECTS, we select the object type, drag out simulation target and delete the relevant row.
For the moment, we leave the Car 1 where it is.
Controlling the behavior of a simulated object
How a simulated object behaves on its journey to its target is controlled by the parameters of the Simulation Behaviour object associated with the object. By default a simulation uses the settings described in Simulation Behavior Parameters. But what happens if we would like the simulation to behave differently, for example if we wanted the car in the previous simulation to move faster?
-
We create a Simulation Behaviour. In SmartSpace Config. Choose TYPES / OBJECTS and drag the Simulation Behaviour type from the TYPE list into the workspace. Double-click <Create new object> and enter the type name “Fast Car” at [external name]. Click Save.
-
Now we can define parameters for this simulation behavior. In SERVICE PARAMETERS, choose Location simulation and then double-click Simulation Behaviour or drag it into the object browser. Double-click Fast Car to display its parameters. Click Edit in the parameters dialog, edit the speed to be 10 m/s and click Save:

-
We go back to TYPES / OBJECTS and set the destination and the simulation behavior for Car 1:

-
Click Save and we should see Car 1 move back to its destination Target 1 much faster than before.
Moving a simulated object along a path
A useful way to control the movement of simulated objects is to use the Paths and queues feature to create routes for objects to follow. We now take the car on a short journey along a path. (If you need more information on creating paths, see Paths and queues configuration.)
-
In SmartSpace Config, we use the PATHS tab to create a path called “Simulation Path” with a number of path points along it:

-
Now in TYPES / OBJECTS we need to make the simulation target one of the path points along the path. We want the car to travel to the end of the path, so we enter “spp024”, the final path point for this path. Again, we can watch the car's progress in the map in OBJECT PLACEMENT:

We still had the object located at Target 1 (from the previous example), so the simulated car moved to the nearest part of the path and then traveled to the end. If we had removed the simulated car (by deleting its simulation target), it would first have moved to the beginning of the path and then traveled its entire length. If we had already placed the car on the path, it would have traveled from that initial position to the target path point at the end of the path. See simulation target <Object> : <Object> for further discussion of types of target.
Again, if we want to manually move Car 1, or remove it from the map, we must unset its simulation target.
Creating multiple simulated objects
In many cases, you will want to simulate many identical objects and their behaviors. Location simulation provides a means of creating batches of simulated objects that exist only for the duration of a simulation—and can be used again and again. To do this, we create a simulation lifecycle and define its parameters.
-
We first define a type on which to base the simulated objects. In TYPES / OBJECTS, double-click <Create new type>. Give the object type a name and then select Simulation Control as its parent. The new type will be shown under Simulation Control in the list of types.

We must remember to give the type a representation. Otherwise we will not see it on the map!
-
We create a lifecycle for the type, by dragging Simulation Lifecycle into the object browser and double-clicking <Create new object>. Give the lifecycle a name and save it:

-
To link the lifecycle to the simulation type, we go to SERVICE PARAMETERS, open the <Select a configuration> dropdown and choose Location simulation. Drag Simulation Lifecycle out into the object browser and then drag out the lifecycle created in TYPES / OBJECTS. Click Edit and we can set the number of simulated objects to be created, a prefix for the names of the objects, and the object type:

Here we enter the number object we want to create—20—and the name of the object type we want the simulated objects to be based on, here the Simulated Car we just created. We specify the name prefix “Car” and so the simulator will create objects called Car01, Car02... Car20.
Click Save to save the details.
-
In TYPES / OBJECTS, we select Simulation Lifecycle in the list of types and drag out the <Lifecycle> is active property. Then double-click <Create new property row>:

We select the lifecycle we created and click Save.
-
We drag out the Simulated Car object and we can see a list of new simulated objects. Drag out the <Object> reached waypoint <Object> from the COMPLEX PROPERTY list, however, and there will be no assertions relating to these objects:

-
We drag one (or more) of the objects out from the list and give them a target, for example a path point along the path we created earlier. Click Save and in OBJECT PLACEMENT, we should see the object(s) move along the path. Assertions are made by the simulator as the objects reach their target:

-
When we have finished with the simulated cars, we remove all the objects created by the simulator by changing the <Lifecycle> is active property to false:
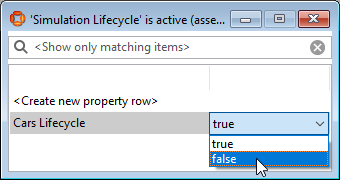
All the objects created by this simulation lifecycle, and their representations, are removed by the simulator.
Random targets and random routing
Now we have created a batch of objects, we can make them go to more than one location, by creating a Simulation Batch Target. Simulation Batch Targets can be objects or paths as required by a simulation.
Random target selection
Here we will send simulated cars to different targets, with the simulator randomly selecting the target for each car. By default, the simulator will select from all targets for every object, so more than one object could end up arriving at the same target. Whilst this would be acceptable if we were modeling small items that were being added to a hopper, we don't want more than one car to occupy the same space, so we will create a behavior that prevents this.
- We begin by creating a Simulation Batch Target. This is a type with which we will associate all the targets the simulator can choose between. In TYPES / OBJECTS and drag the Simulation Batch Target type from the TYPE list into the workspace. Double-click <Create new object> and enter the type name “Vehicle Spaces” at [external name]. Click Save.
-
We add targets to this object by adding a row for every one we want to include. In TYPES / OBJECTS, drag out <Simulation Target Group> has member <Object> from the COMPLEX PROPERTY list and double-click <Create new property row>:

Select Vehicle Spaces for the Simulation Target Group and then the Destination type and the Target 1 object. Click Save.
-
We add further rows for the other targets we want to include:

We also make sure all these targets have been placed on the map.
-
Now we create the behavior that will prevent more than one car arriving at any one target. We do this by modifying the “Fast Cars” Simulation Behaviour we created previously. In SERVICE PARAMETERS, we choose Location simulation and then double-clickSimulation Behaviour or drag it into the object browser. Double-click Fast Car to display its parameters. Click Edit in the parameters dialog and at choose unique target select true. Click Save.
-
We tell the simulator to create the cars by adding a property row to the <Lifecycle> is active property (as described above).
-
We display the list of simulated objects, select a number of them, and drag them out to add the required target group and behavior:

Note: We have selected more objects than there are targets.
-
We drag out the, currently empty, <Object> reached waypoint <Object> list.
-
When we save the details for the simulated cars, we can view the results in the OBJECT PLACEMENT and see the simulator make assertions about objects’ locations as they are placed on the map:

Only four of the simulated objects are displayed, each in one of the available targets. If we run the simulation again, by deactivating it and then repeating steps 5 to 8, a different result will occur.
Random path selection
Simulation Targets Groups can also be configured to use paths. When creating the rows in <Simulation Target Group> has member <Object>, instead of specifying objects we add path points. When run, the simulated objects will be allocated a random path point from the group and will move to it obeying the rules described in Path point targets.
For example, we create three paths, and generate path points along their routes. We want our objects to follow the entire length of the paths, so we make the final path point on each of the paths a member of the target group:

Simulation example with Business rules
The previous section showed you the simple principles behind creating simulations. All the examples required you to manually set and change properties. Using business rules you can automate these activities, for example creating rules that move objects through a succession of targets, and add refinements, such as using spaces and containments to prevent collisions.
The following section introduce the business rules contained in simulation_example_generic_module.xml and highlights key elements of their design. See Load the simulation example module for information on installing this module.
Data model
‘Simulation’ type
A ‘Simulation’ type lets you create named simulations that can be switched on or off, and you can use complex properties to attach simulation semantics to application objects while keeping a clear separation between simulation and application logic.
Properties
To keep simulation logic separate from application logic, use the ‘Simulation’ type in properties and assertions that involve application objects. Example properties include:
-
<Simulation> is active : Bool
-
<Simulation> prevents collisions : Bool
-
the waypoint after <Object> in <Simulation> : Object
-
<Object> imparts <Simulation Behaviour> in <Simulation> : Bool
-
<Object> acquired <Simulation Behaviour> from <Object> in <Simulation> : Bool
-
the priority of <Simulation Behaviour> : Int
Business rules
Update simulation properties
“Update simulation properties” is the main rule in the example. It demonstrates how Simulation Behaviours can be prioritized with the use of the priority property. (This property is added to the Simulation Type when the example module is installed.)

Check for new objects
“Check for new objects “ demonstrates the correct way to detect that a lifecycle has created an object by ensuring its simulation behavior becomes non-null when its simulation target is null.

Check for waypoint instructions
This rule shows how waypoints can be configured to impart instructions in order that complex routes can be constructed.

Remove expired instructions
This rule demonstrates the behavior timeout feature.

Configuration
If you import the example data model, you need to configure it for your requirements.
Create objects
Create a named ‘Simulation’ and a ‘Simulation Lifecycle’.
You also need to create Simulation Behaviours, for example to define “roaming”, “paused” and “moving”.
Configure service parameters
Set suitable values for the example ‘Simulation Behaviour’ objects, and configure your ‘Simulation Lifecycle’ to create the desired objects.
For example, if you have created the “roaming”, “paused” and “moving” Simulation Behaviours, you could configure them as follows:
| Simulation Behaviour | Service Parameters |
|---|---|
| roaming | Set the target to be a space and use a time out to configure how long the object will “bounce around” within this space. |
| paused | Set the speed to 0. You could also set a timeout to define how long the object is paused. |
| moving | Set the speed to be a value greater than 0. |
Create a route
Add rows for ‘the waypoint after <Object> in <Simulation>’ to define the route objects will take in the simulation. For the first waypoint, use the ‘Simulation’ object itself as the predecessor, so the example rule “Check for new objects” can find the first instruction.
Add behaviors
Add rows for ‘<Object> imparts <Simulation Behaviour> in <Simulation>’ for the waypoints. You can combine “moving” and “roaming” behaviours to make objects roam until that behaviour times out, and then move to the next waypoint.