Logging to a database
The first step when using SmartSpace Reporting is to log properties and locations to a database. This is so you can access the logged properties and locations later on when creating charts, tables and reports.
This section will guide you through:
-
Creating a database with SQL Server
-
Connecting the database to SmartSpace
-
Setting up logging of properties and locations to the database
-
Creating indexes
Creating and connecting to a database
Before you can use SmartSpace Reporting, you need to create a database and connect to it from SmartSpace Config so that SmartSpace has permissions to modify the database schema, and to read and write data.
This section demonstrates how to create a database with SQL Server on the same server as the SmartSpace controller using integrated authentication. These steps are completed in SQL Server Management Studio.
Creating a database with SQL Server
A database requires a login. SQL Server has two methods of authentication when connecting to the server: Windows Authentication and SQL Server. To see which are enabled for your server engine, start SQL Server Management Studio and then connect to the database engine. Right click on the server at the top of the tree view, and select Properties.
This section uses Windows authentication.
Follow the steps to create a new database in SQL Server Management Studio:
-
Create a login using Windows authentication.
-
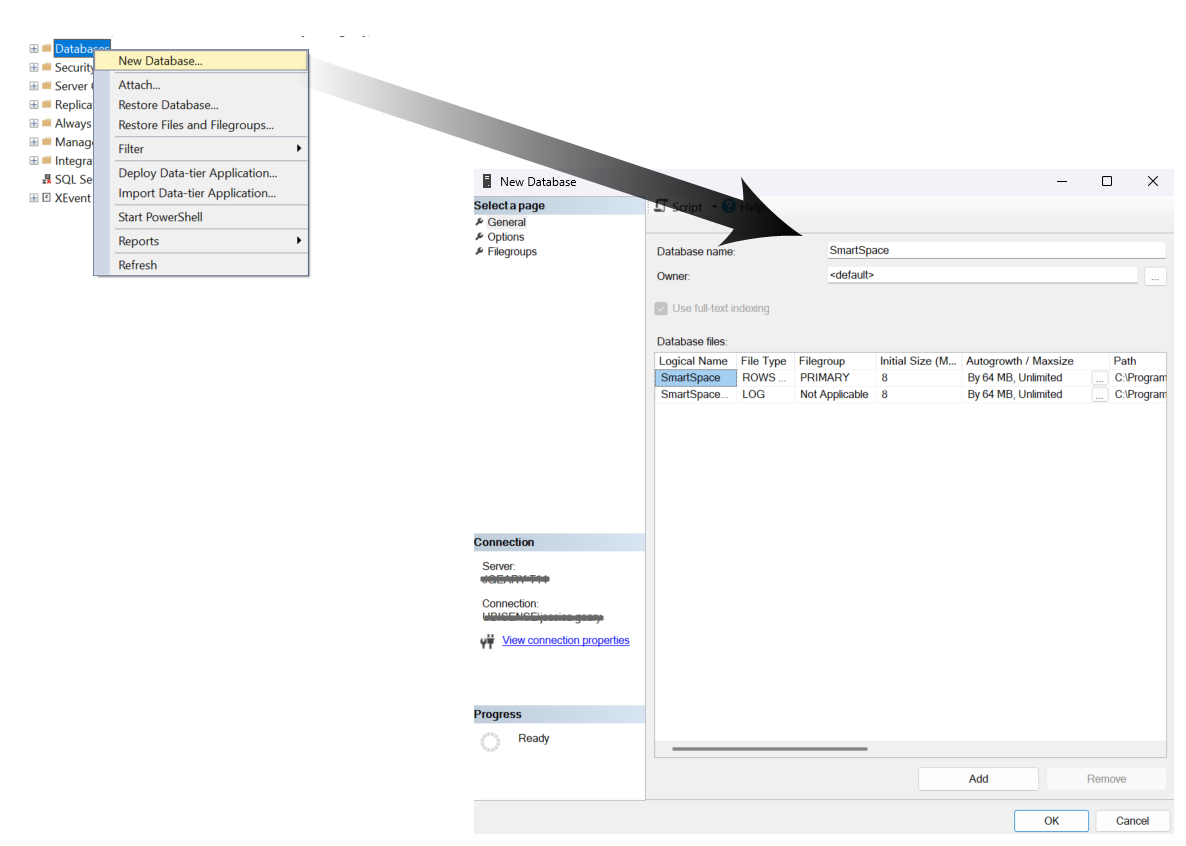
Right-click on Databases in the tree view and select New Database…
-
Enter a name for the database (the name can be anything you like, but this tutorial uses the name SmartSpace).
-
Add required roles
-
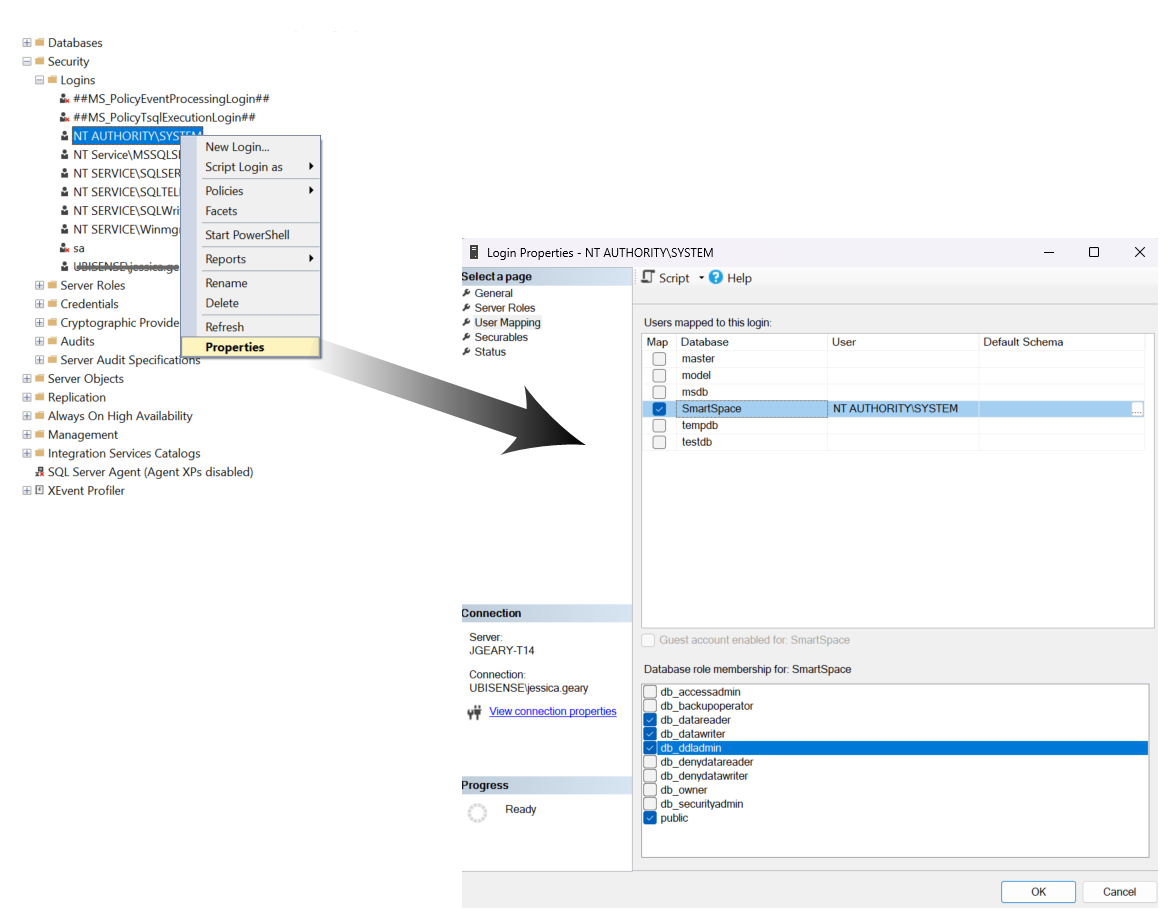
Go to Security -> Logins -> NT AUTHORITY\SYSTEM -> Properties
This assumes that the Ubisense platform and the controller are running as the user NT AUTHORITY\SYSTEM, which is the default when you install SmartSpace. This is why you are adding the roles to this Windows user. -
Under User Mapping, select your database and select the roles db_datareader, db_datawriter, db_ddladmin
-
Connecting to a database
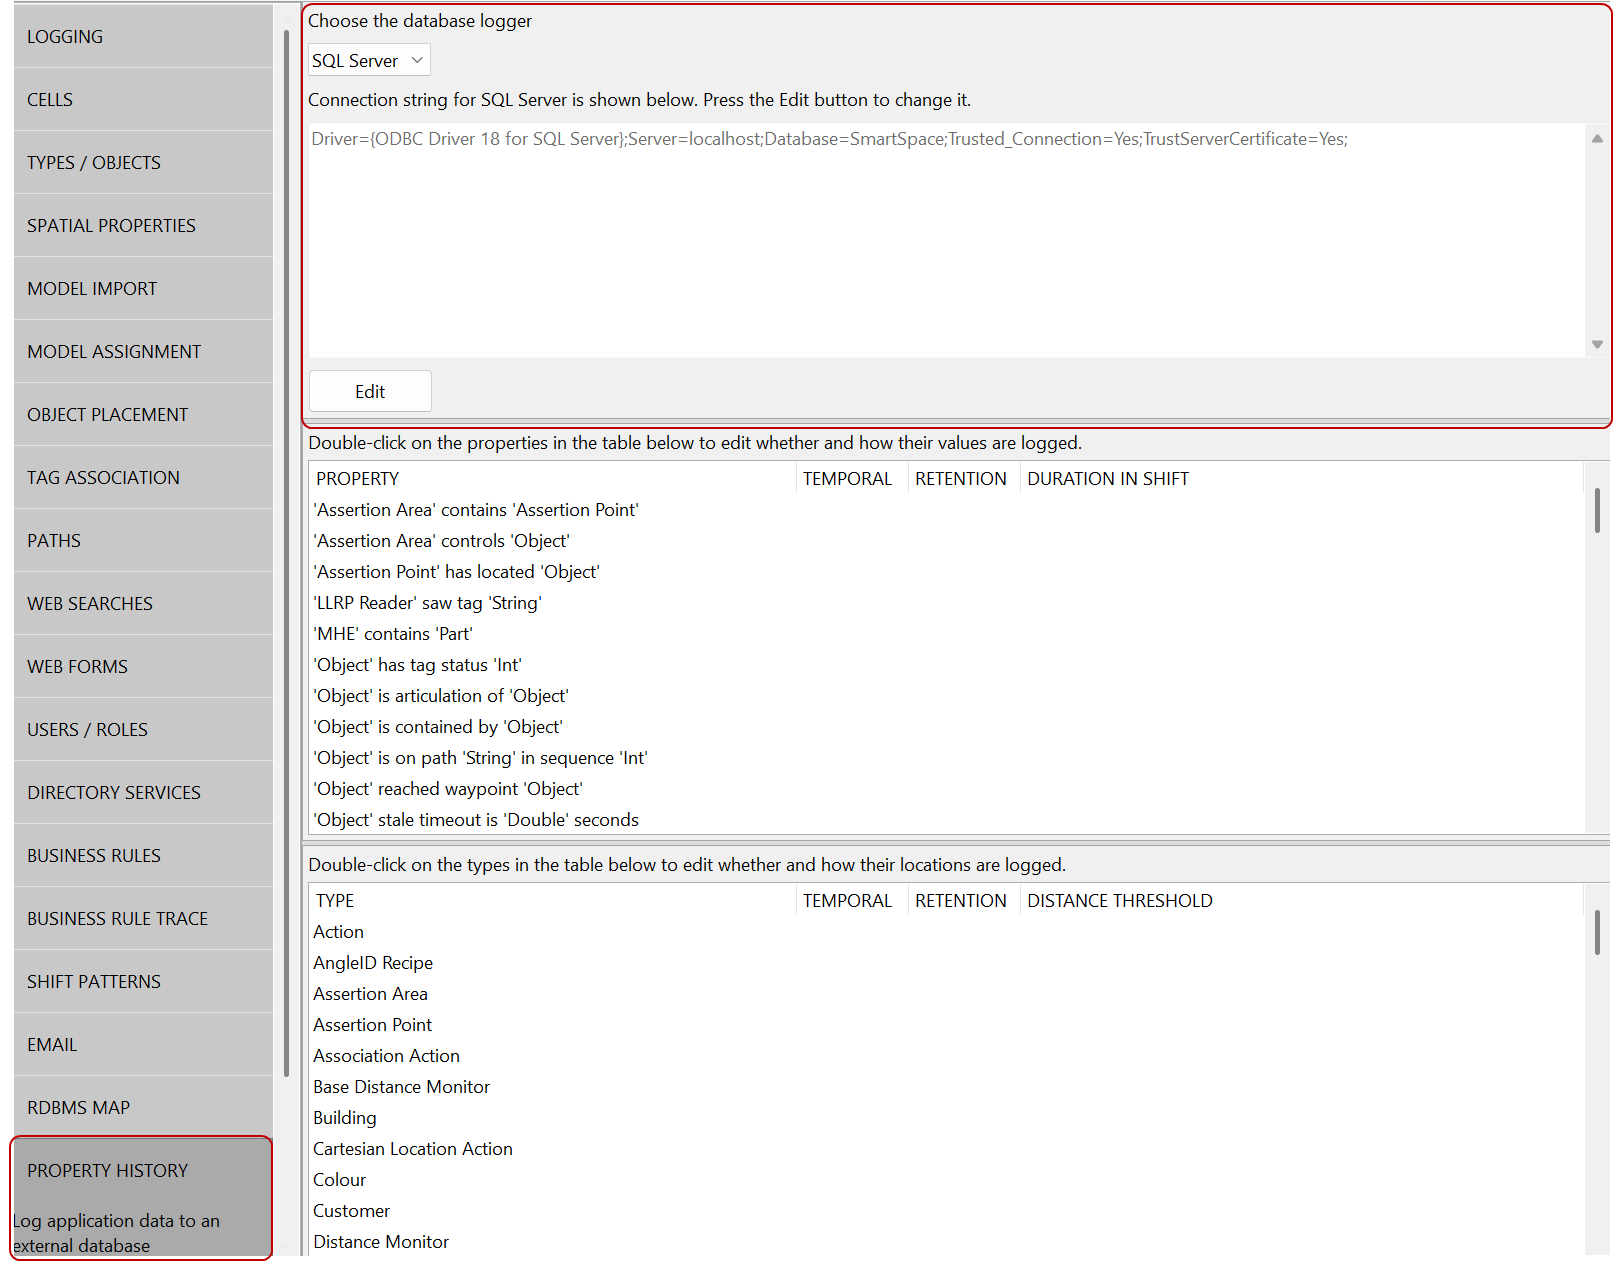
Connection settings are completed in SmartSpace Config under the PROPERTY HISTORY tab. To set and test your connection settings:
-
Select PROPERTY HISTORY in SmartSpace Config.
-
Select SQL Server from the dropdown and click Edit.
-
Add the following connection string:
CopyDriver={ODBC Driver 18 for SQL Server};Server=localhost;Database=SmartSpace;Trusted_Connection=Yes;TrustServerCertificate=Yes; -
Click Test to check that the login worked.
If an error is generated after testing the connection string, follow these troubleshooting steps:
-
Check the server logs in SQL Server Management Studio under Management/SQL Server Logs. Look for a notification of a failed login, which should describe the reason the login failed.
-
If the login failure doesn’t appear in the server log, check the server name and instance.
-
If the server name and instance are correct, run the SQL Server Configuration Manager and ensure that the TCP/IP protocol is enabled for your server instance.
Setting up logging
With your database connected, you can now configure the logging required for each object property and location to be logged.
Logging for properties and locations is configured in PROPERTY HISTORY.
Each property has following options:
-
Log only current values
-
If a property is set and then updated, only the most recent value is in the database
-
If a property is deleted then the last value is kept in the database but marked as not current
If you log only current values then you can't specify how long the value should be retained. Current values don't have any information about when the value was set, so it can't compute the time that it should be deleted. If you log only current values and then set An interval expressed below in days, it won't do anything.
-
-
Log values for an interval of time specified below
-
When the value changes, a new property log row is created with a start time
-
When the value is removed, the end time is set
-
This options allows you to clean up old values after a configured time interval
-
When specifying the interval of time, it is up to you whether you want to keep those values forever or for a specified number of days
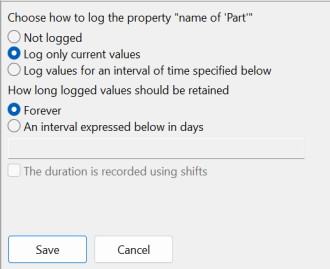
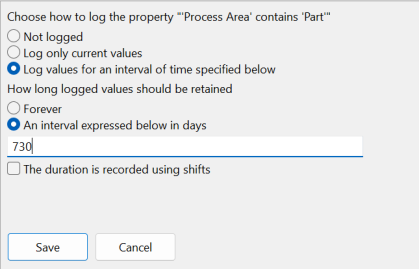
Select a retention interval when selecting Log values for an interval of time specified below, otherwise you will have to design an external method to clean up old data.
-
Temporal or non-temporal schema structure
Temporal logged properties and types are those that are defined when selecting Log values for an interval of time specified below, whereas non-temporal logged properties are those that are defined when selecting Log only current values. Temporal properties have a new row for each time that property row is true and has a from and to field. Non-temporal properties only display the current values and whether or not the row has been removed.
This tutorial uses both temporal and non-temporal schema structures. See the table below to view the properties and type locations that you will log in this tutorial.
| Property/type | Temporal/non-temporal |
Property/location logging |
|---|---|---|
|
'Process Area' contains 'Part' |
Temporal |
Property logging |
|
name of 'Part' |
Non-temporal |
Property logging |
|
name of 'Process Area' |
Non-temporal |
Property logging |
|
Part |
Temporal |
Location logging |
Non-temporal schema structure
For non-temporal logged properties, the schema structure contains the object column in the property and indicates whether the row is current or has been removed. For example, the schema structure for name of 'Part' looks like:

Temporal schema structure
Temporal schema structures contain L_FROM and L_TO columns to log the start and end times of the temporal logged property. The temporal property used in this tutorial, 'Process Area' contains 'Part', also has two objects, so the schema structure contains two object columns. View the image below to see the schema structure for 'Process Area' contains 'Part'.
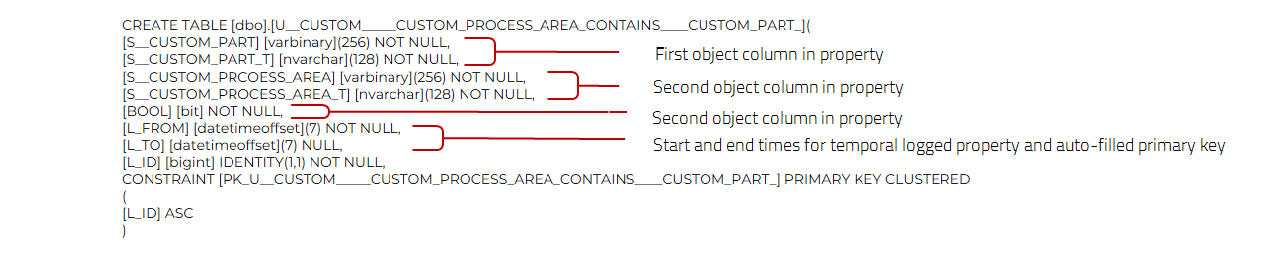
Logging of properties
-
Double-click on the property name of 'Part' to log it to the database.
 Click the image to enlarge.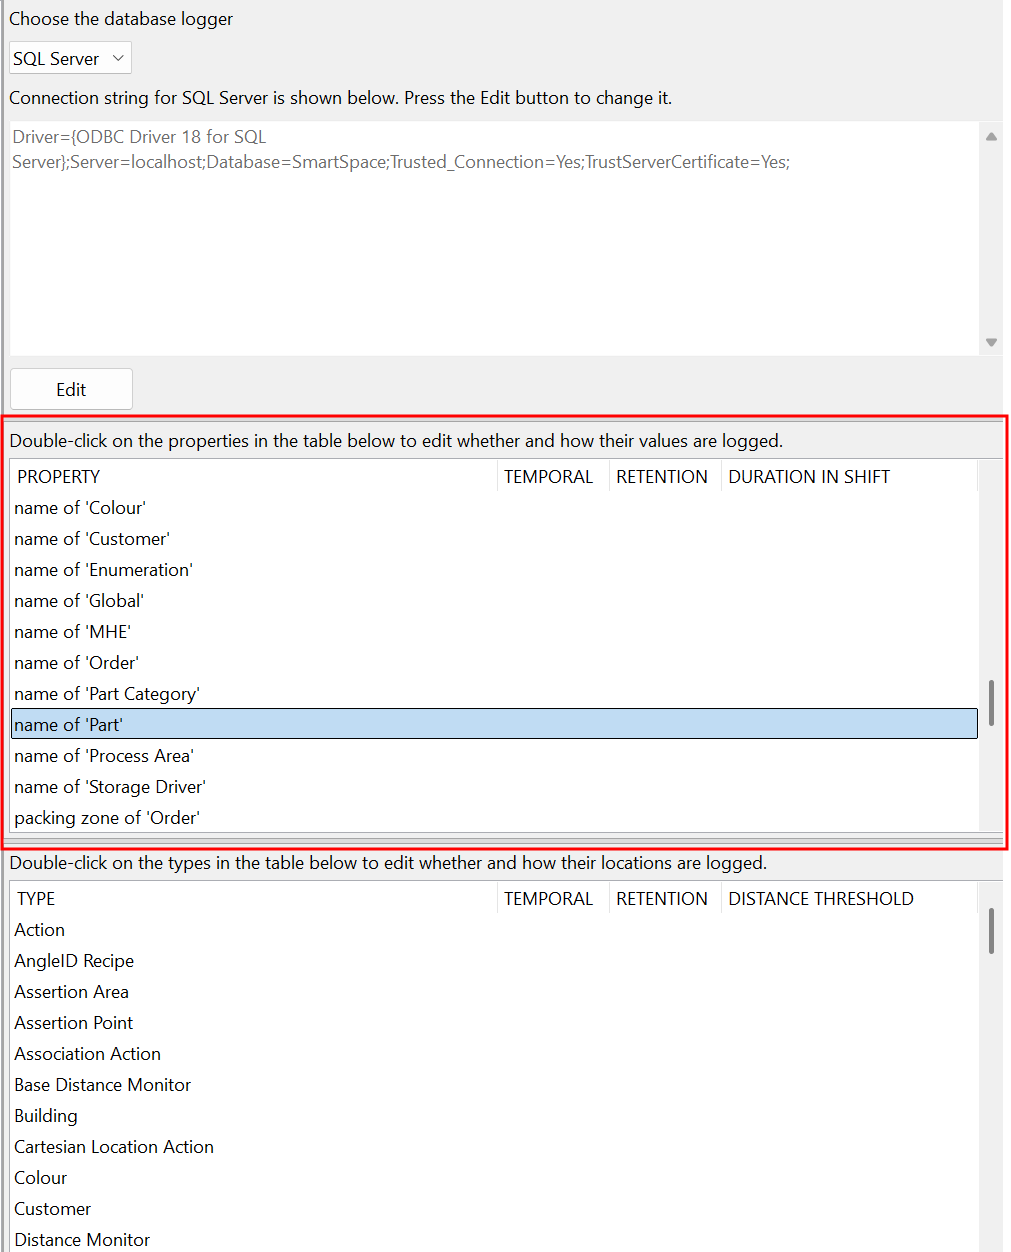
-
Select Log only current values to be retained Forever.
Click the image to enlarge.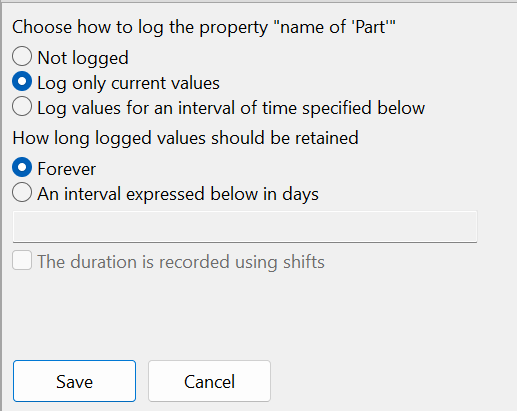
-
Repeat steps 1 and 2 for the name of 'Process Area'.
-
Select 'Process Area' contains 'Part' from the list of properties to log its values. Select Log values for an interval of time specified below and enter 730 in the field An interval expressed below in days.
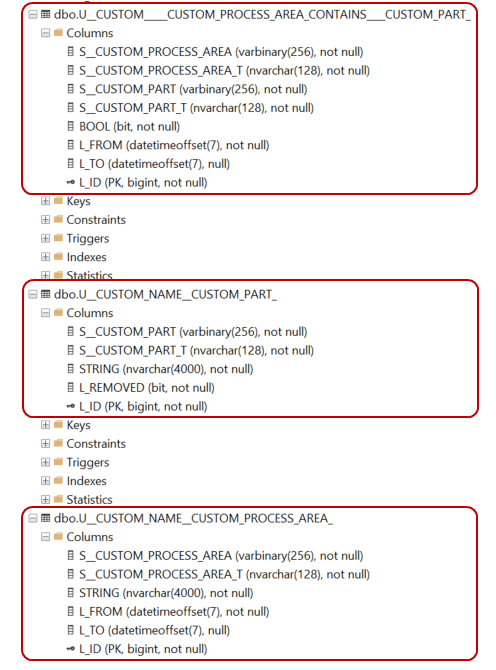
If you view the corresponding tables in SQL Server Management Studio, you will notice that:
-
There is one table per logged property
-
The name of the table is generated from the property name
-
[dbo].[U__CUSTOM_____CUSTOM_PROCESS_AREA_CONTAINS____CUSTOM_PART_]
-
[dbo].[U__CUSTOM_NAME__CUSTOM_PART_]
-
[dbo].[U__CUSTOM_NAME__CUSTOM_PROCESS_AREA_]
If these tables don't appear, but your test succeeded when you tested the connection, you should check to see that you have assigned the correct roles (specifically db_ddladmin) to the user that you're connecting as. In this tutorial, the user is NT Authority/System. If you have not assigned the db_ddladmin admin role, then these tables will not appear.
-
-
Columns are based on the property contents, plus the type of logging (temporal or current values)
Logging of locations
To generate location history reports, you need to enable location logging for the types you wish to report on.
-
Double-click on Part to log its locations.
Click the image to enlarge.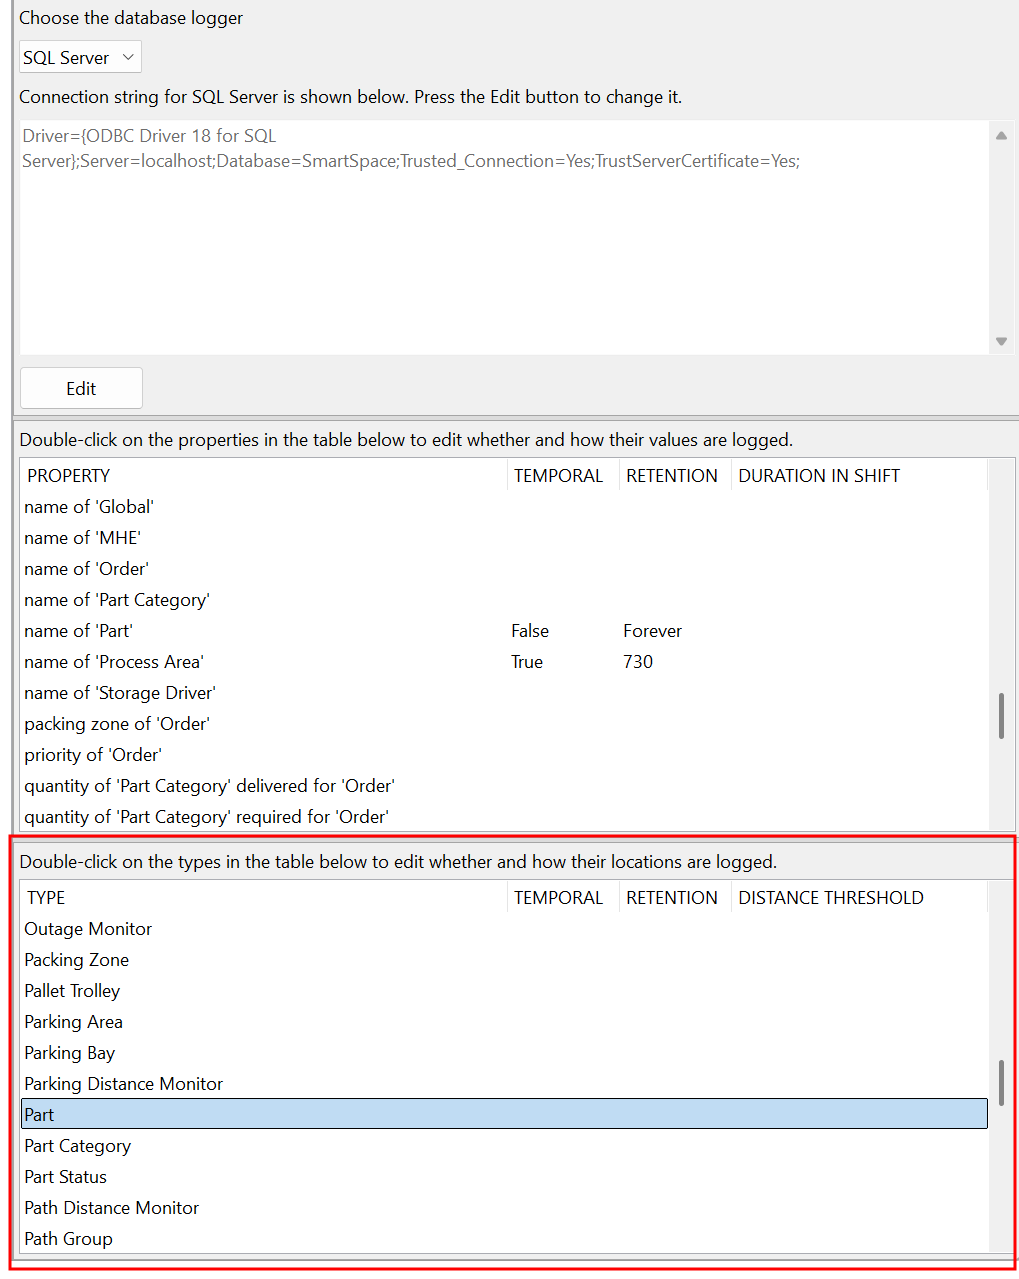
-
Select Log only current locations and set a distance threshold of 2 meters.
Click the image to enlarge.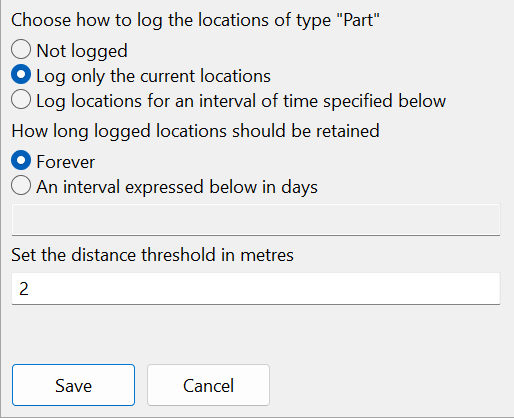
Select a distance threshold that is as large as possible while still capturing the required level of detail. This reduces the amount of data that is stored into the database, and thus returned by location history queries. At the very least, the distance threshold should be greater than the noise expected from the location system, and generally you should set a threshold which is considered to be a “significant” change in location for the type of object tracked, otherwise your database will quickly become unwieldy, and reports will be slow to generate and hard to interpret.
-
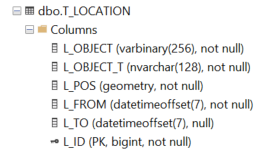
View the corresponding table in SQL Server Management Studio. Note that logged locations are stored in a table called T_LOCATION.
Index creation
Database indexes allow the database engine to execute queries and operations on tables without having to scan through the entire table contents. Although the logging services create the schema tables with suitable formats to record the logged properties, they do not create any indexes on those tables. The reason for this is that the specific indexes best suited to the application depend on the data logged and on the queries that are executed against that logged data. Since each index created increases database storage use, and also adds overhead for row changes, no indexes are created by default.
We recommend you have as a minimum and index on:
-
Temporal logs: the primary object column, L_TO
-
Non-temporal logs: the primary object column
Without these indexes, updates will eventually slow down to a crawl.
Missing indexes SQL scripts can be used to work out what needs to be indexed, after some data has been captured for testing.
After some data has been captured for testing, you can use it to identify missing indexes. SQL scripts for finding missing indexes are widely available and we recommend using one if you cannot find missing indexes by directly analyzing the data.
Next steps
Move on to User roles to assign the correct roles to your user to allow you to access the reporting editor on the SmartSpace web site.