Shifts in SmartSpace Web
The shifts screen in the Operations web interface allows you to view and modify shift patterns to enable the Business rules engine to define working times, and for use in Reporting. These activities can also be carried out in the Shift patterns workspace in SmartSpace Config. For a fuller description of how shift patterns work, see Shifts
Click on Shifts to display the screen in SmartSpace Web.
Only members of the System.Manager role can access this screen.
Creating Shift Patterns
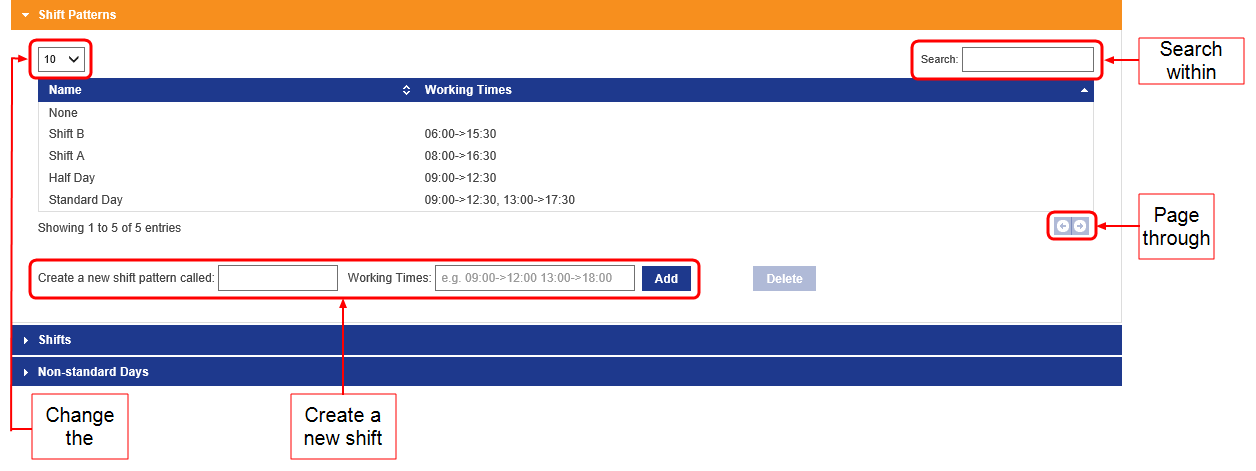
Click on Shift Patterns to open a tab where you can view and define shift patterns and their associated working times.

A shift pattern defines the working times within a 24-hour time period. More than one period of work can be input for each shift pattern, for example to enable the scheduling of break periods.
To add a new shift pattern:
- Type a name for the shift pattern at Create a new shift pattern called.
- Type in the working times:
- Enter time spans using the 24-hour clock
- Use -> to separate start and end times
- There can be several time spans, for example to indicate scheduled breaks in the working day, separated by a space
- Time spans cannot extend over midnight
- Click Add.
Defining Shifts
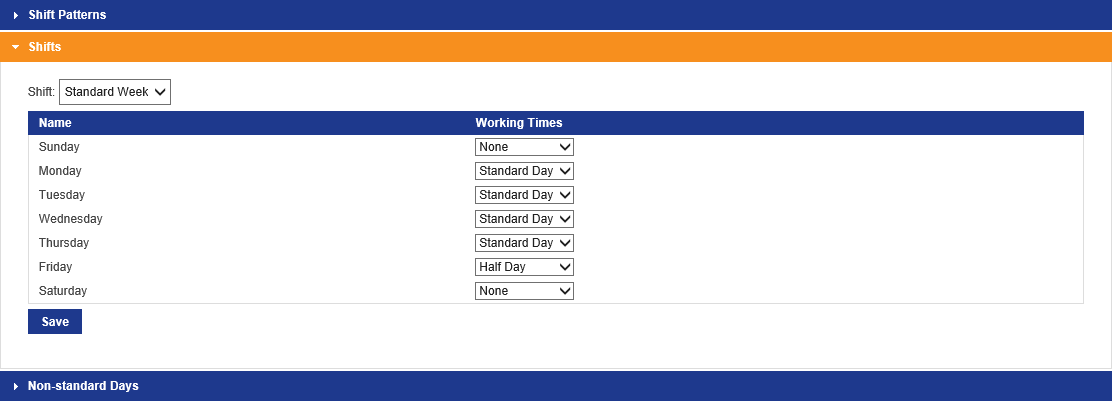
Click on Shifts to open a tab where you can display shifts and view and update the shift patterns associated with each day of the week.

To add shift patterns to the days of the week for a defined shift:
- Choose the shift from the dropdown.
- Set the shift pattern for a day by choosing from the Working Times dropdown for each day. The dropdown lists None (for a non-working day) and all shift patterns defined in the top part of the screen.
- Click Save.
Overriding a Shift Pattern for a Single Day
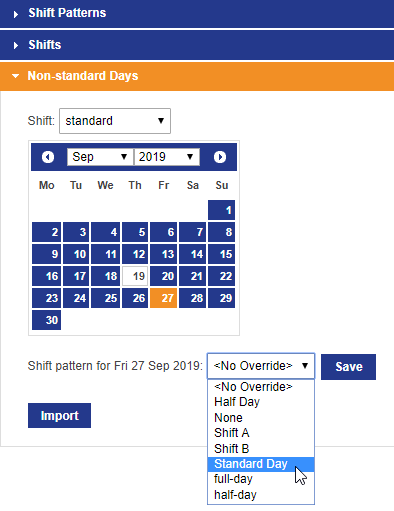
You can assign a specific shift pattern to a single date overriding its usual shift pattern. Click on Non-standard Days to open a tab where you can amend the shift pattern for a selected shift and date.

To assign a specific shift pattern to a single date:
- Select the shift from the Shift dropdown.
- Select the month and year, and click on the date.
- Choose the shift pattern from the dropdown or choose <No Override> to remove a previously-applied override.
- Click Save.
Any date that has been overridden is underlined on the calendar display.
Importing Shift Pattern Overrides
You can import a number of overrides from a text file rather than entering them individually. This can be useful, for example, to import a year's public holidays in advance.
The text file must be in CSV format organized as in the following example (the header row is optional):
date,shift,shift pattern
09/09/2019,Standard Week,None
10/09/2019,Standard Week,None
12/09/2019,Standard Week,Early lunch
16/09/2019,Standard Week,Early lunch
17/09/2019,Standard Week,Early lunch
18/09/2019,Standard Week,Early lunch
19/09/2019,Standard Week,Early lunch
20/09/2019,Standard Week,
The date field must be in a suitable locale-based format, or YYYY-MM-DD. Any lines without a valid date in the first column will be ignored.
Leave the third column blank to clear a date override.
The format of the shift and shift pattern must match those configured in the Shifts screen (or in SmartSpace Config).
To import shift pattern overrides:
- Create a CSV file containing the dates and overrides, as described above.
-
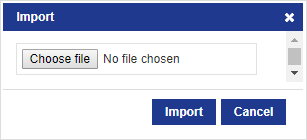
In the Shifts screen, open the Non-standard Days tab and click Import:

- In the Import dialog, click Choose file, select the CSV file, and click Open.
-
Click Import to start the process.
When the import is complete, the message Completed displays.