Creating areas for use in ACS
In ACS, areas are used to partition the site model. Usually an area will represent some complete, but relatively self-contained region of the site, such as one floor of a building, or one functional area of a large floor. Before you can use areas in ACS, you must define them either in SmartSpace Config or by using command-line tools to import area definitions: see Creating areas for use in ACS. Areas created in SmartSpace Config are not visible in the ACS Main GUI and you cannot define an area's walls using SmartSpace Config: use the command-line tools if you need to see the area in ACS or add walls to an area.
You can also retrieve areas currently defined in ACS for modification in SmartSpace as described in Copying areas from a Generation 2.X program. If you do this, you must remember to push the changed areas back to ACS. See Copying areas to a Generation 2.X program
Creating a new area object
To create a new area:
- In SmartSpace Config, click TYPES / OBJECTS to open the Types and objects workspace.
- Drag the Generation2 Area object type from the Types list into the Object Browser workspace.
- Choose <Create new object>.
-
Give the area a unique name.
You do not need to change any other properties.
- Click Save.

Adding a spatial extent to an area
To add a spatial extent to the area:
- In SmartSpace Config click SPATIAL PROPERTIES to open the Spatial properties workspace
- Select Generation2 Area from the <Select a type> dropdown.
-
Select extent from the <Select a property> dropdown.
All areas with specific spaces already defined are listed.

- Choose <Create new specific space>.
-
Select an area from the Choose an object dropdown.
Only areas without a defined specific space are listed.
-
Define the extent for the area. See Configure space properties of typesinformation how to define the extent of an object.
- Select the Generation2 Area extent check box to highlight all areas with defined spatial extents.
- Click Save.
When you have defined all your site's areas you can copy them to ACS.
Copying areas to a Generation 2.X program
To copy areas to ACS:
- In SmartSpace Config click SPATIAL PROPERTIES.
- Select Generation2 Area from the <Select a type> dropdown.
-
Select extent from the <Select a property> dropdown.
All areas with specific spaces already defined are listed.
-
Choose Push areas to Generation2.X.
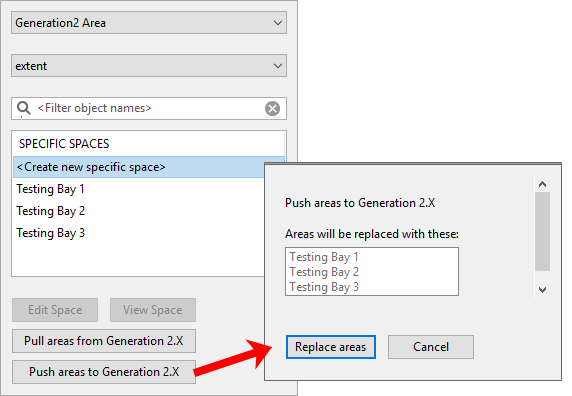
- Click Replace areas to confirm.
Copying areas from a Generation 2.X program
To copy areas from ACS into SmartSpace:
- In SmartSpace Config click SPATIAL PROPERTIES.
- Select Generation2 Area from the <Select a type> dropdown.
-
Select extent from the <Select a property> dropdown.
All areas with specific spaces already defined are listed.
-
Choose Pull areas from Generation2.X.
- Click Replace areas to confirm.