Customizing how selected objects are highlighted on the web map
By default when an object is selected, it is highlighted on the web map with a circular green halo centered round the object's origin:

In some cases, for example a very large object or to make a selected object more visible against a "busy" background, you might want to identify the selected object in a different way. By using a rep mode with the special name of <selected> and an associated object representation, you can replace the green halo with a more suitable indicator.
The steps to follow, in SmartSpace Config, are described in the example below where we replace the default highlight for the Crates object with a red rectangle to be displayed behind the selected crate:

-
In MODEL IMPORT, import a suitable image file to use instead of the default halo.
See Model import for information on importing images.
-
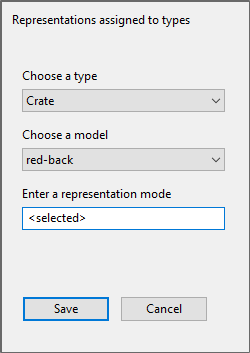
In MODEL ASSIGNMENT, assign the rep and the <selected> rep mode to the object type by double-clicking <Add new type rep>, choosing the type, model and, for its rep mode, typing in <selected>:
-
In WEB SEARCHES, add the rep mode to any searches using the object type where you want to use the new highlight. For example, in a relevant search we double-click <Add mode>and choose <selected> from the dropdown:

We click Add. Then to make sure the highlight is shown behind the object we drag it to the top of the list of reps:

You can also fix the highlight so that it rotates with the selected object and limit the minimum size to which it can be reduced when zooming out from the image. See Mandatory Controls in Web searches for more information on configuring rep modes for web searches.