Ubisense Mini Tags
The Ubisense DIMENSION4 Mini Tag (D4FLAT33) is a small self-contained tracking tag, intended for high-accuracy tracking of smaller objects or people. Mini Tags are mechanically strong and resistant to dust and water. Additional features of Mini Tags are:
- an LED for easy status identification
- a motion detector to instantly activate a stationary tag
- a magnetic magnet activated switch to trigger context-sensitive events
- a replaceable battery
A variety of mounting methods allow the Mini Tag to be securely attached to a wide range of objects.
Haptic Feedback
Ubisense DIMENSION4 Mini Tags are available with haptic feedback integrated into the same small-sized tag, useful for providing immediate feedback if the tag is worn or carried by a worker.
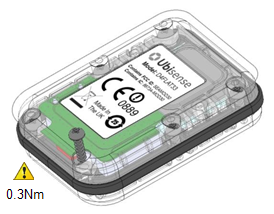
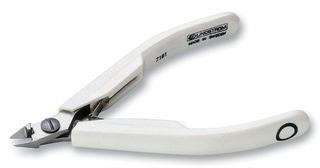
Features of Mini Tags
The features of Mini Tags are shown in the following figure.

Features of Mini Tags
| Feature | Description |
|---|---|
| A. Magnet Activated Switch | Reed switch you can use to activate the tag and put it back into the deep sleep state. You can use any reasonably strong magnet (for example a fridge magnet) for these purposes. |
| B. LED | The tag has an LED, which flashes when it is active. |
Activating Mini Tags
To preserve the battery, Mini Tags are shipped in the deep sleep (deactivated) state.
Before you use a tag for the first time, it must be woken up (activated) from the deep sleep state.
To activate a tag:
- Hold a strong magnet (such as a fridge magnet) against the magnet activated switch. The LED lights up.
- Continue to hold the magnet for a few seconds. The LED does a dim to bright transition, and then starts blinking. The tag is now activated and ready to be used.
Putting Mini Tags into Deep Sleep
If a tag is activated, you can put it back into the deep sleep state at any time to preserve the battery.
It is not possible to accidentally put a tag into deep sleep because the tag sets a 'challenge' and expects a 'response'.
Putting a Tag into a Deep Sleep
To put a tag into the deep sleep state:
-
Hold a strong magnet (such as a fridge magnet) against the magnet activated switch for a few seconds. The LED stops blinking in readiness for the first challenge.
-
Remove the magnet from the magnet activated switch.
-
Count the number of times the LED blinks. This can be from two to five blinks.
-
Hold against and then remove the magnet from the magnet activated switch the same number of times.
-
Repeat Steps 3 and 4. The LED on the tag does a dim to bright transition, and the tag enters the deep sleep state (the state in which it was shipped).
Note: If you hold and remove the magnet from the magnet activated switch the wrong number of times during Steps 3 and 4, the tag starts blinking again. If this occurs, restart the process as described in Step 1.
Replacing the Battery of a Mini Tag
This section explains how to replace the batteries of Ubisense Mini Tags.
Tag parameters are retained when the power source is removed from the tag.
Suggested Tools
To prevent risk of damage to the enclosure we recommend the use of a good quality torque driver; the screws only require a relatively low torque so find a driver that goes low enough.
We recommend the Wera 7440 Torque driver, which can be set from 30cNm – 1.2Nm:
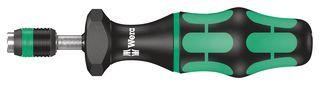
Wera 7440 Torque driver
The wide torque range means this driver is also suitable for use with the Industrial Tags, which require a torque of 0.8Nm. If you are only ever replacing the batteries in the D4FLAT33 tag then you may also want to consider the lower-cost Wera 7460 Torque driver, as this is pre-set to 30cNm.
When selecting a bit to use with this driver ensure the body of the bit does not cause damage to the enclosure. We recommend Wera part reference 05059910001:
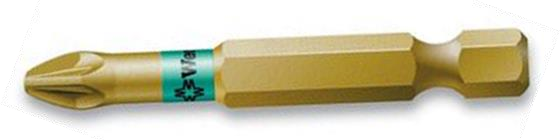
WERA bit with long neck
The long neck, which is narrower diameter than the head, prevents damage to the enclosure during removal or subsequent replacement of the screws.
Non-Conducting Spudger
A non-conducting (plastic) screwdriver or a sharp-edged spudger can make removal of the original battery easier:
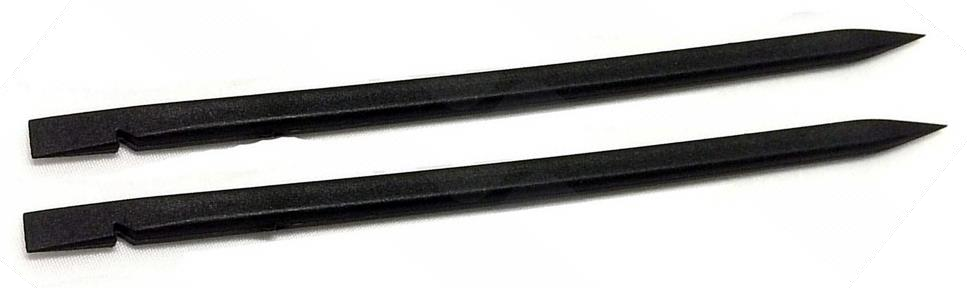
Non-conducting spudger
The sharp end should be small enough to fit into the enclosure without interfering with any of the small components present on the carrier PCB.
Battery Replacement Process for Mini Tags
The process for replacing batteries in Mini Tags is shown in the following figure.

Process for Replacing Batteries in Mini Tags
Opening the Enclosure
The first step is to loosen and remove the six screws that hold the enclosure together. You should use a PZ1 driver, with as narrow a diameter as possible; see Suggested Tools for a recommended part.
Remove the six screws and place to one side:
Removing the Screws
Turn the enclosure over and remove the front part of the enclosure. Take care not to catch the antenna (highlighted in the red circle) that is located underneath the Ubisense logo on the enclosure:
Removing the Front Part of the Enclosure
Optionally you can also remove the gasket, placing this to one side; this makes it easier to access the underside of the battery in the next step:
Removing the Gasket
The battery is now exposed and ready for removal from the two connectors.
Removing the Old Battery
Two circular connectors hold the battery terminal leads in place:

Easing the Leads out and Releasing the Battery
The terminals are sprung-loaded, ensuring a good electrical connection even when subjecting the tag to shock or vibration. Use a non-conductive plastic screwdriver or “spudger” to ease the leads out carefully and release the battery by pushing the sharp end under the edge of the battery and then applying light leverage against the edge of the enclosure. Take care not to damage the small component that is located between the terminals; ideally try to apply force to each of the corners in turn, carefully lifting the battery away from the PCB.
Fitting the New Battery
You should be using one of the Ubisense spare parts (part code FLATBAT), or have modified an off the-shelf battery according to the instructions provided in Modifying An Off-The-Shelf Battery.
To fit the new battery, align the two leads with the connectors on the PCB and gently push the battery down until the bottom of the battery is in contact with the PCB:
Fitting the New Battery
Take care not to accidentally bend either of the battery leads while pushing it down into place. You should also avoid contact with the antenna (highlighted in the red circle) to avoid risk of bending or snapping it.
Resealing the Enclosure
Inspect both sides of the gasket and ensure there are no rips or tears. Blow any dust or other contaminants from each of the surfaces. Replace the gasket back onto the enclosure, around the battery, aligning the openings of the gasket with the screw bosses; the gasket is reflectively symmetric, so it does not matter which way around you fit it as long as it aligns with the bosses in the enclosure.
Check the exposed surface does not have any dust or other contaminants present on it and then replace the rear half of the enclosure, ensuring that the screw bosses align with the gasket and front-half of the enclosure. If there is any dust present, it may be blown away, ideally using compressed air.
Using a good-quality torque driver, reseal the enclosure:
Resealing the Enclosure
Replace each of the screws in turn into the openings in the back of the enclosure and tighten them to a torque of 0.3Nm (30cNm); take care not to over-tighten them to avoid any damage to the enclosure.
Once you have tightened all six screws, you may optionally use a set of calipers to verify the enclosure is providing the correct compression to the gasket: the overall thickness of the assembled enclosure should be 14mm (within a tolerance of +/-0.05mm) across the full length. If any of the areas near a screw are thicker than this, verify the screw at that position is at the correct torque.
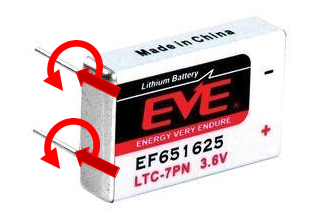
Modifying an Off-the-shelf Battery
The D4FLAT33 tag uses a customized version of the EVE EF651625 prismatic cell. The Ubisense part code for a replacement battery is FLATBAT. When bought “off-the-shelf”, this battery is a four-terminal device:

EVE EF651625 prismatic cell
To prepare this battery for use with the D4FLAT33 tag, you will need to remove the two spot-welded support pins and trim two formed-contacts to the correct length.
Removing the Spot-Welded Support Pins
To remove the two spot-welded support pins you will need a pair of needle-nosed pliers:
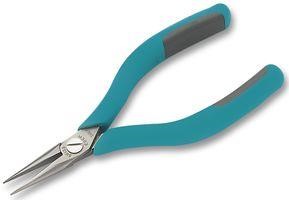
Needle-nosed pliers
Use the pliers to grip along the pin and then gently twist around the weld to snap it:
Modifying Support Pins
The contact should lift away from the battery. Note that both contacts are at the same voltage (ground), so it does not matter if you accidentally touch the neighboring contact during this operation.
Trimming the Formed Terminals
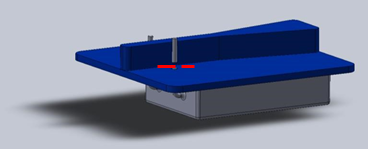
We recommend the use of a simple jig to assist with the removal of the battery contacts. If you have access to a 3D printer, you can download STL data to print this for yourself, or Ubisense can supply a printed version for a small fee.
This picture shows the underside of the jig:
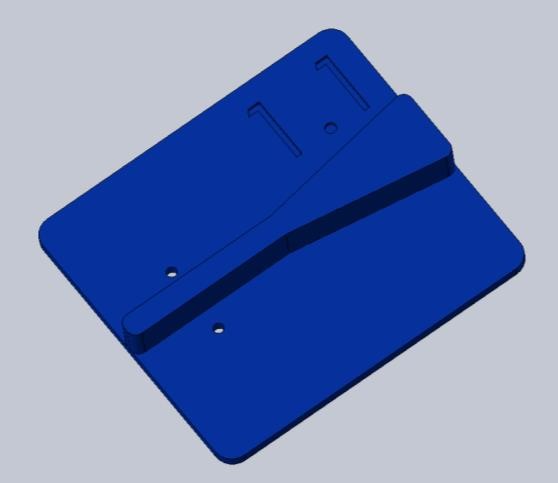
Underside of jig
The thickness of the body of the jig defines the length of the battery leads; do not apply any scaling when printing the part! The rib helps prevent accidental shorting of the battery leads during cropping.
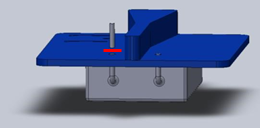
Push the battery leads through the jig from the opposite side to the one with the rib, taking care not to bend the leads or stab your fingers:
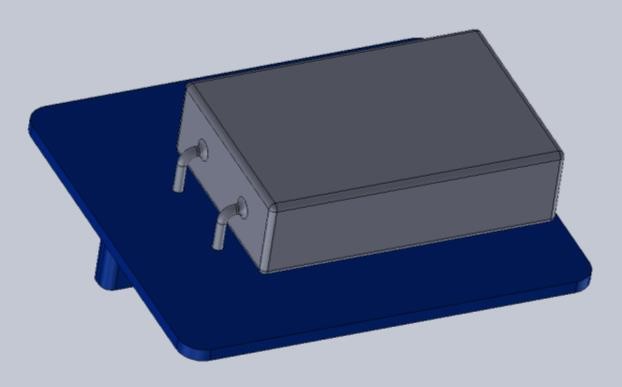
Pushing battery leads through the jig
You should use a good-quality pair of flush-fit side-cutters, as shown below:
Flush-fit side-cutters
Turn the jig over, with the battery in place and keeping it pushed flush to the flat surface. Using the side-cutters, trim the battery contact flush with the underside of the jig:
Trimming first battery lead
When trimming the battery lead keep the cutters below the top surface of the rib to minimize the risk of accidentally shorting the two battery leads. Repeat the process for the second battery lead:
Trimming second battery lead
Discard the unused battery contacts carefully. You now have a suitable battery for the replacement procedure described in Battery Replacement Process for Mini Tags.
Disposing of Batteries
After you have replaced batteries, dispose of the old batteries according to the manufacturer’s instructions or in an environmentally-conscious manner.
Resetting the Battery History
After you have replaced the battery in a DIMENSION4 tag, you must reset the battery history of the tag. This enables you to:
-
Clear all previous battery usage history
-
Restart the battery history data collection process for the new battery
You can reset the battery history:
-
If you have a license for the SmartSpace Visibility feature, on the Tag and Battery Status screen of SmartSpace Web. See Resetting Battery Status on the SmartSpace website.
-
For tags which have been associated with a SmartSpace object, in SmartSpace Config on the TAG ASSOCIATION tab.
-
By using the command-line tool ubisense_tag_battery_replaced and specifying the <tag> ID
For example:
ubisense_tag_battery_replaced 00:11:ce:00:00:De:ad:Be:efOr, by running ubisense_tag_battery_replaced without the <tag> argument and reading tag IDs from standard input
Note: This tool was introduced with version 3.6 and replaces the use of the ubisense_battery_monitor_config command-line tool in earlier 1.x versions.