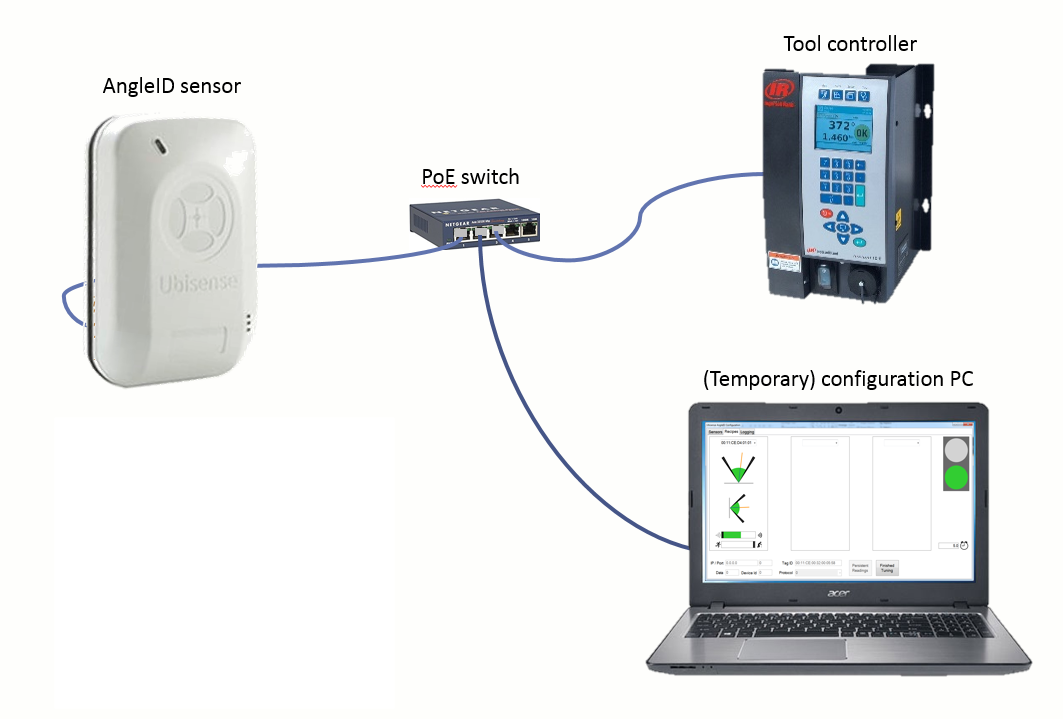
Example AngleID Reader Configuration
These instructions describe how to set up an AngleID reader with the simplest possible configuration.
The instructions assume little knowledge of operating and connecting computer systems and networks. For more detailed information about installing and configuring your AngleID installation, see Configuration. You can also download the Quick Start Guide which summarizes the important steps in setting up AngleID.
The following devices are used in the simple setup:
- An AngleID reader
- A tool controller
- A network switch
- A Windows PC for configuring the reader (referred to as the “configuration PC”)

The following network settings are used to illustrate the configuration:
|
Device |
IP address |
Netmask |
Gateway |
|---|---|---|---|
|
Tool controller |
A.B.C.X |
255.255.255.0 |
A.B.C.X |
|
Configuration PC |
A.B.C.Y |
255.255.255.0 |
A.B.C.X |
|
AngleID reader |
A.B.C.Z |
255.255.255.0 |
A.B.C.X |
These instructions assume that the reader has been registered and the AngleID Config Tool and license have been installed on the configuration PC. These steps are described in Before You Start.
Configuration Process
-
Connect the Devices.
Plug the laptop, AngleID reader and tool controller into the switch.
-
Install the Reader.
Run the AngleID Config Tool and in the Sensors tab select the reader. On the right-hand side of the tab, enter the IP address A.B.C.Z, leave the Netmask at the default setting of 255.255.255.0, and enter the Gateway A.B.C.X. Click Store network configuration and the configuration process begins. Progress is summarized on the right-hand side of the Sensors tab.
When the process is complete, the following details display under Stored IP settings:
- IP address: A.B.C.Z
- Netmask: 255.255.255.0
- Gateway: A.B.C.X
- Config: A.B.C.Y
-
Create a recipe.
Use the tool controller's IP address A.B.C.X when creating a recipe in the Recipes tab.
|
|
